How to Build a Real-Time Chat App on Cloudflare?
How to Build a Real-Time Chat App on Cloudflare?
- Why Enterprise RAID Rebuilding Succeeds Where Consumer Arrays Fail?
- Linus Torvalds Rejects MMC Subsystem Updates for Linux 7.0: “Complete Garbage”
- The Man Who Maintained Sudo for 30 Years Now Struggles to Fund the Work That Powers Millions of Servers
- How Close Are Quantum Computers to Breaking RSA-2048?
- Why Windows 10 Users Are Flocking to Zorin OS 18 Instead of Linux Mint?
- How to Prevent Ransomware Infection Risks?
- What is the best alternative to Microsoft Office?
Build a Real-Time
Chat App on Cloudflare
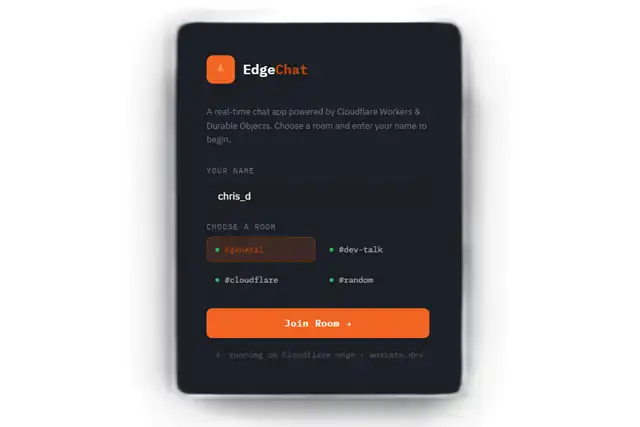
A complete, accurate guide — from environment setup to global deployment — using Workers, Durable Objects, and WebSockets.
How It All Fits Together
Cloudflare Workers give you a globally distributed JavaScript runtime that runs at the edge — no servers to manage. For a chat app, you need two Cloudflare primitives working in tandem:
Client A
Edge Router
Durable Object
Persistent Storage
Client B
same room ID
instance
Cloudflare Worker — receives HTTP/WebSocket requests and routes them to the correct Durable Object instance based on the room ID.
Durable Object (ChatRoom) — a stateful, single-instance object that keeps all WebSocket connections for a room in memory and broadcasts messages to every connected client. It also uses SQLite-backed storage for message history.
RateLimiter Durable Object — a lightweight companion object that throttles individual IP addresses to prevent spam.
Prerequisites
- A free Cloudflare account
- Node.js v20 LTS or later installed
- Git installed
- Basic familiarity with JavaScript / terminal commands
- Durable Objects are available on the Workers Paid plan ($5/month) — the free plan does not support them
Install the Required Tools
A. Install Git
Git is needed to clone the official demo repository. Download it from git-scm.com/downloads and follow the installer for your OS.
git --version
# Expected output: git version 2.x.x
B. Install Node.js (v20 LTS recommended)
Download the LTS release from nodejs.org. Node v20+ is recommended as of 2025–2026; v18 works but is approaching end-of-life. The installer includes npm automatically.
node -v   # v20.x.x or higher
npm  -v   # 10.x.x or higher
C. Install the Wrangler CLI
Wrangler is Cloudflare’s official CLI for building, testing, and deploying Workers. Install it globally:
npm install -g wrangler

# Verify
wrangler --version
# Expected: ⛅️ wrangler 3.x.xwrangler directly. If you prefer not to install globally, every Wrangler command can be prefixed with npx (e.g. npx wrangler dev), which runs the locally installed version from your project’s node_modules.
D. Authenticate Wrangler with your Cloudflare account
wrangler loginThis opens a browser window asking you to authorize Wrangler to access your Cloudflare account. Once approved, your credentials are stored locally and all subsequent deploys are tied to your account.
Get the Project Code
The official Cloudflare Workers Chat Demo is the canonical starting point. Clone it and install dependencies:
git clone https://github.com/cloudflare/workers-chat-demo.git
cd workers-chat-demo
npm install
After installation, your project directory will look like this:
git config --global http.proxy http://127.0.0.1:PORT — replacing PORT with your proxy port. Remove it afterward with git config --global --unset http.proxy.
Understand the Configuration
The wrangler.toml file tells Cloudflare how to build and deploy your Worker. Here is what the config looks like and what each part does:
name               = "edge-chat-demo"
compatibility_date = "2024-01-01"
main               = "src/chat.mjs"

# Bind Durable Object classes to variable names
[durable_objects]
bindings = [
  { name = "rooms",    class_name = "ChatRoom"    },
  { name = "limiters", class_name = "RateLimiter" },
]

# Serve the HTML file as a static asset
[[rules]]
type        = "Data"
globs       = ["**/*.html"]
fallthrough = false

# Register classes as Durable Objects with SQLite storage
[[migrations]]
tag               = "v1"
new_sqlite_classes = ["ChatRoom", "RateLimiter"]
Configuration breakdown
name — The name of your deployed Worker, visible in the Cloudflare dashboard.
compatibility_date — Pins the Worker to a specific behavior snapshot. Prevents future Cloudflare platform changes from silently breaking your code.
main — Entry point file. The Worker runtime executes this module first.
[durable_objects].bindings — Maps a variable name (e.g. env.rooms) to a Durable Object class (ChatRoom). Your Worker code uses env.rooms.get(id) to get a stub pointing at the correct instance.
new_sqlite_classes — Registers the listed classes as Durable Objects with SQLite-backed storage (the current recommended approach, replacing the older new_classes syntax).
new_classes
Older tutorials use new_classes in the migrations block. The correct modern syntax is new_sqlite_classes, which provisions each Durable Object with its own SQLite database for persistent storage.
Core Code Logic
The app has two layers: the Worker router (stateless, handles HTTP/WebSocket upgrades) and the ChatRoom Durable Object (stateful, manages connections and broadcasts).
Worker: routing requests to a room
export default {
  async fetch(request, env) {
    const url = new URL(request.url);

    // Extract the room name from the URL path, e.g. /room/general
    const roomName = url.pathname.slice(1) || "default";

    // Derive a stable Durable Object ID from the room name
    const id = env.rooms.idFromName(roomName);

    // Get a stub — a proxy to the Durable Object instance
    const room = env.rooms.get(id);

    // Forward the request to the ChatRoom Durable Object
    return room.fetch(request);
  }
};
ChatRoom Durable Object: managing WebSocket connections
export class ChatRoom {
  constructor(state, env) {
    this.state   = state;
    this.sessions = [];  // All active WebSocket connections in this room
  }

  async fetch(request) {
    // Upgrade HTTP → WebSocket
    const [client, server] = new WebSocketPair();
    server.accept();

    // Add this connection to the room's session list
    this.sessions.push(server);

    server.addEventListener("message", (event) => {
      // Broadcast every message to all other clients
      for (const session of this.sessions) {
        if (session !== server) session.send(event.data);
      }
    });

    server.addEventListener("close", () => {
      // Remove session on disconnect
      this.sessions = this.sessions.filter(s => s !== server);
    });

    return new Response(null, {
      status: 101,
      webSocket: client,
    });
  }
}ChatRoom instance runs as a single process in one Cloudflare data center. This guarantees that all WebSocket connections for a given room share the same in-memory session list — something that would require an external pub/sub system (Redis, etc.) in a traditional multi-server setup.
RateLimiter Durable Object
The RateLimiter class is a simple companion object that tracks request counts per IP. Each IP maps to its own RateLimiter instance. If a client sends messages too quickly, the ChatRoom asks the RateLimiter and rejects the message if the limit is exceeded. This prevents any single user from flooding the room.
Local Development & Testing
Before touching production, run the app locally with wrangler dev. This starts a local HTTP server that simulates the Cloudflare Workers runtime, including Durable Object support:
wrangler dev

# Output will include something like:
# ⛅️  wrangler 3.x.x
# -------------------------------------------------------
# wrangler dev now uses local mode by default.
# [mf:inf] Ready on http://127.0.0.1:8787
Open http://127.0.0.1:8787 in two browser tabs to simulate two chat participants. Messages sent in one tab should appear in the other in real time.
wrangler dev. This is expected behavior for local testing.
Deploy to Cloudflare’s Global Network
When you’re happy with local testing, one command deploys your Worker to Cloudflare’s edge — available globally within seconds:
wrangler deploy

# Successful output looks like:
# Uploaded edge-chat-demo (1.23 sec)
# Published edge-chat-demo (0.45 sec)
# https://edge-chat-demo.YOUR-SUBDOMAIN.workers.dev
Cloudflare will print a live URL — something like https://edge-chat-demo.your-subdomain.workers.dev. Open it in multiple browsers or share it with anyone; your chat room is live.
What happens on deploy?
Wrangler bundles your Worker code, registers the Durable Object classes via the migrations you defined, and distributes everything across Cloudflare’s network. The first time a room is accessed after deployment, Cloudflare automatically allocates a Durable Object instance for it.
Accuracy & Common Pitfalls
Some older articles and tutorials contain outdated information. Here is a quick reference of what is current:
❌  Old: new_classes = ["ChatRoom", "RateLimiter"]
✅  Now: new_sqlite_classes = ["ChatRoom", "RateLimiter"]

❌  Old: Node.js v18 recommended
✅  Now: Node.js v20 LTS (v18 is near end-of-life)

❌  Old: npm install -g wrangler, then use npx wrangler (inconsistent)
✅  Now: pick one — global install → use wrangler
              OR no global install → always use npx wrangler

❌  Old: Durable Objects available on free plan
✅ Now: Durable Objects require the Workers Paid plan ($5/mo)- Always use
new_sqlite_classesin migrations, notnew_classes - Node.js v20+ LTS is the current recommended version
- Durable Objects are not available on the free Workers tier
- Be consistent: either install Wrangler globally or always use
npx - The
compatibility_datefield is mandatory — omitting it causes a deployment error - Local state in
wrangler devis ephemeral and resets on restart