A Free Intercom/Paging system with Raspberry pi and old Android phones
A Free Intercom/Paging system with Raspberry pi and old Android phones
- 60% of MD5 Password Hashes Can Be Cracked in Under an Hour with a Single GPU
- Dirty Frag: Root Access on Every Major Linux Distribution — No Patch, No Warning
- Ubuntu 26.04 LTS (Resolute Raccoon): The Most Ambitious Ubuntu LTS in a Decade
- Proton Mail: Data Transferred to FBI Again!
- How Close Are Quantum Computers to Breaking RSA-2048?
- How to Prevent Ransomware Infection Risks?
- What is the best alternative to Microsoft Office?
A Free Intercom/Paging system with Raspberry pi and old Android phones.
Nowadays more and more people changed their smartphones every 2-3 years, which caused many old Android phones left at home years.
You could sell these old phones to 2nd hand market, but just tens bucks, so you may use these old Android phones for a wonderful DIY project: Home intercom/paging system with a Raspberry Pi.
Such intercom/paging usually costs you thousands dollar, so it’s worth to have a try if you are handy enough.
Let’s start it!
1. Hardware:
-
- Router with WIFI N/AC/AX
- Raspberry Pi: 3 or 4
- Smart phones: Android phones. iPhone also works, but some functions may not be enabled.
2. Install PBX software on Raspberry Pi
Follow this tutorial to install a PBX software on Raspberry Pi.
https://www.pbxscience.com/diy-a-pbx-phone-system-on-raspberry-pi/
3. Add extension on PBX
- Add some extensions on PBX. For example, assign one extension number to one Android phone.
-
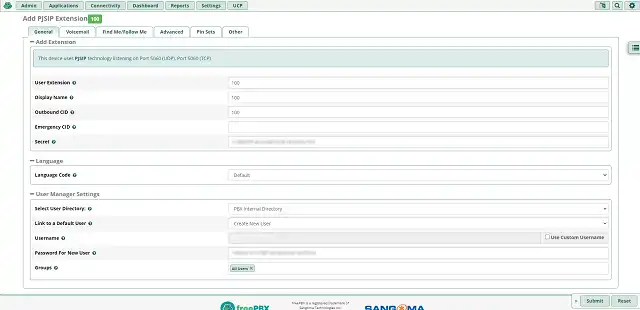
- Login into PBX administration UI ➟ Applications ➟ Extension ➟ Add Extension
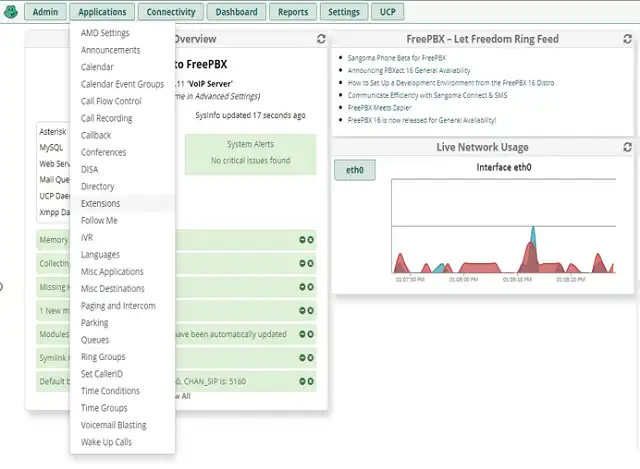
- Add Extension: Select to add PJSIP extension. Remember extension number and password
4. Configure Android phone as an extension
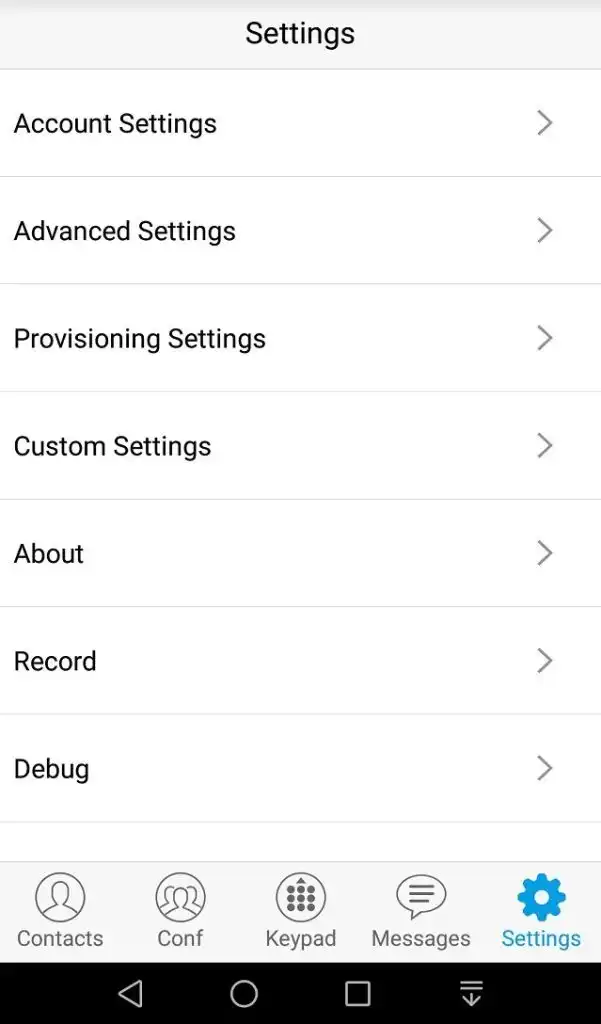
1) Install softphonee on Android phone:
- Free Softphone: install “Grandstream wave lite” (GS wave) from Google Paly.
- Go to Setting ➞ Account Setting ➞ Add New Account ➞ SIP Account
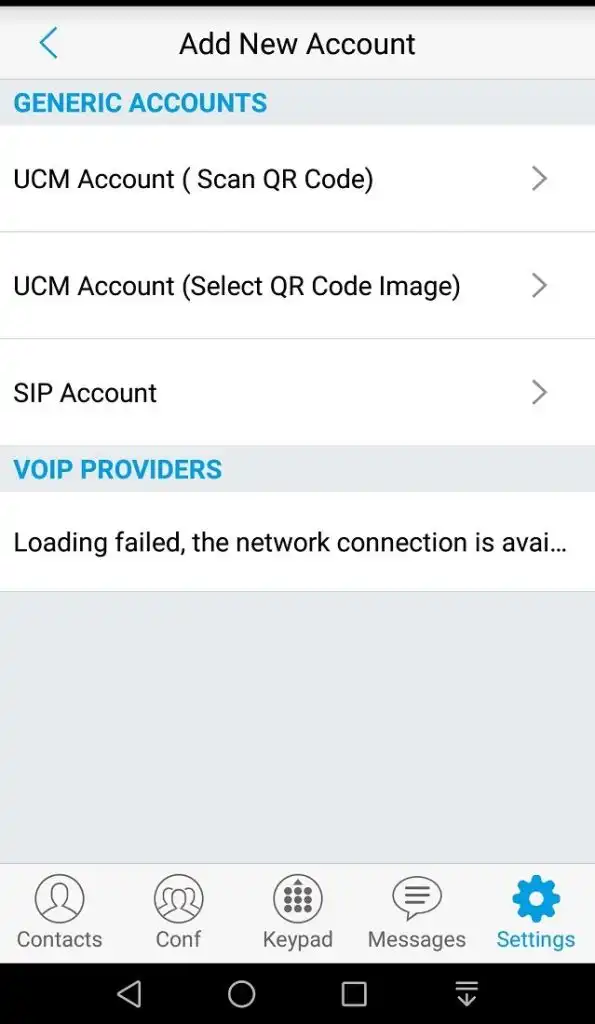
- Input the IP OF SIP SERVER (raspberry Pi), SIP User IP (extension number) and password, then save the change.
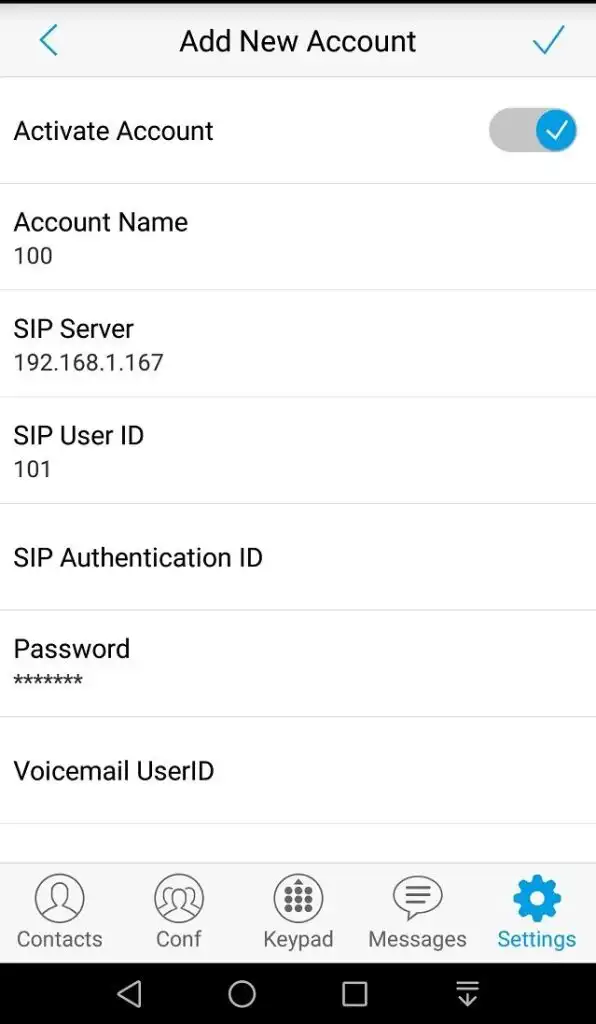
- Return to the SIP account just set up and find “AUTO ANSWER”, change ” No” to ” Yes”
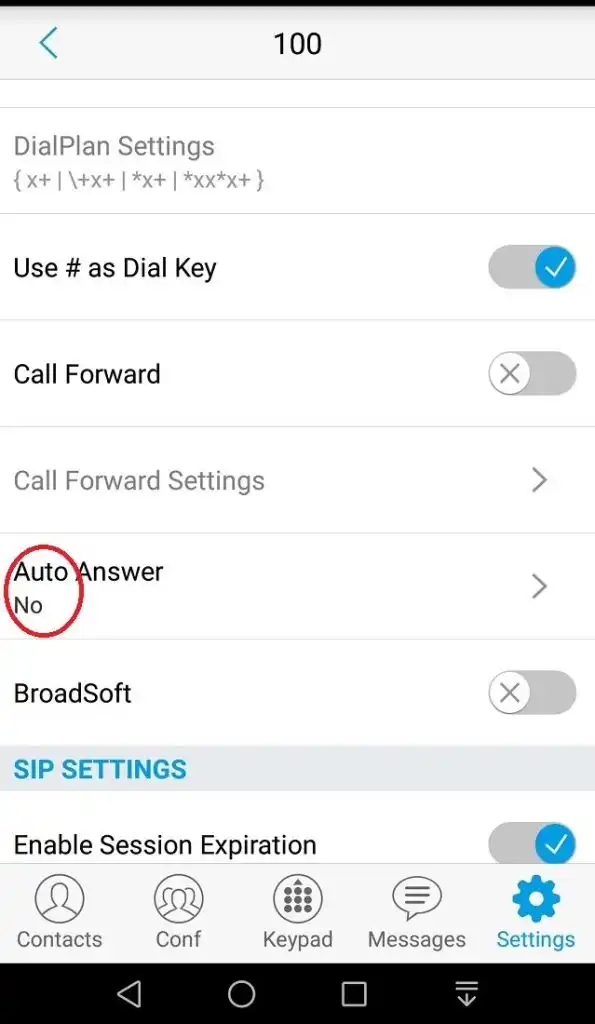
-
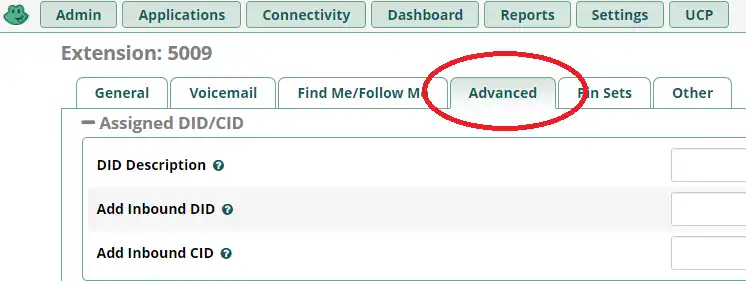
- you can enable auto-answer on PBX server instead of turning on “Auto Answer” on android phone. It’s recommended if you need Android phone as pager ( one-way voice).
-
-
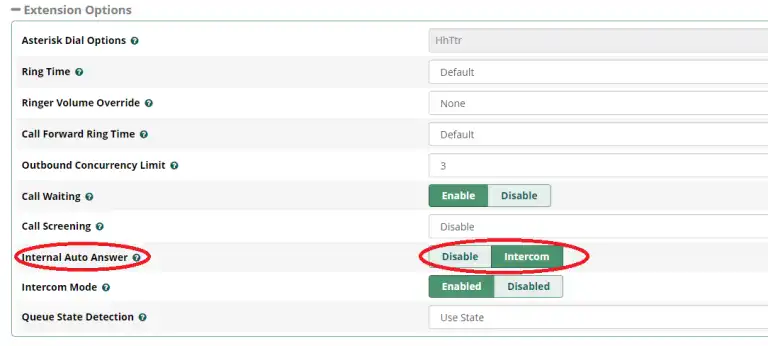
- Got Extension ➡ Advanced ➡ Internal Auto Answer
-
-
-
- Internal Auto Answer: Change “Disable” to ” Intercom”
-
- Paid softphone: Groundwire is recommended!
Important:
Don’t forget to set Softphone running in background in case it will be killed by OS.
2) Put one Android phone to one room, and connect to power supply
3) Have a test
Call the extension number of Android phone in a room, no pickup need, Android phone will be auto-answered (hand-free) and phone speaker will be turn on automatically (acts as pager’s speaker).
You also could connect a Bluetooth speaker into the android phone for the louder sounds.
More infromation about Softphone (SIP phone)
At the end:
- You could use iPhone as the extension also, but IOS would kill softphone in the background if iPhone was not waking, so extension might not ring and speaker couldn’t be turned on automatically. Consequently Android phone is recommended.
- You could buy some IP phones instead of Android phones for better performance because IP phone has much better noise-canceling than the “hand-free” on Android phone.
A Free Intercom/Paging system with Raspberry pi and old Android phones
Free IP PBX solutions:
- Asterisk (FreePBX)
- Freeswitch (FusionPBX)
- SIPFoundry
- OpenSIPS
- Kamailio
How to Build an Enterprise-class Phone System?
How to Build IP-PBX on Raspberry Pi?